Building a Telegram Bot on Azure Function in Rust
In this tutorial, I'll go through the process of building a telegram bot in Rust, hosted in Azure Function. As an example, we build a bot to randomly pick a line from the message to help you, for example, decide what to eat for dinner.
Why Serverless
Azure Function is a serverless service. Unlike most of the service which charges according to the time your service is running, serverless charges for the time when you're actually processing an request. It's very suitable for the service that is called infrequently, for example, a personal Telegram Bot that only be used several times a day.
Why Rust
Besides that I love this language, Rust is also a perfect match for serverless. Serverless is charged by the duration the request is handled and the memory used in this duration. Rust is very efficient and the memory usage is very small.
Prepare
-
An Azure account.
-
The Azure Functions extension for Visual Studio Code.
-
The Azure Functions Core Tools version 3.x. Use the
func --versioncommand to check that it is correctly installed. -
rustup and a Rust development environment.
-
A GitHub account if you want to use GitHub Action to deploy the bot.
-
A telegram bot. You can create it via BotFather. Make sure to keep the token.
-
ngrok for local testing.
Create the project
-
Open VSCode.
-
Choose the Azure icon in the Activity bar, then in the Azure: Functions area, select the Create new project... icon.

-
Choose a directory location for your project workspace and choose Select.
-
Provide the following information at the prompts:
-
Select a language for your function project: Choose
Custom. -
Select a template for your project's first function: Choose
HTTP trigger. -
Provide a function name: In this example, we use
pick-bot-funcas the function name. -
Authorization level: Choose
Anonymous. -
Select how you would like to open your project: Choose
Open in current window.
VSCode will create the project and open it.
-
-
After the project is open, open the terminal from VSCode (or manually
cdinto the project), initialize a Rust project namedhandler.1
cargo init --name handler
-
In
.gitignore, addhandlerandhandler.exe. -
Open host.json.
- In the
customHandler.descriptionsection, set the value ofdefaultExecutablePathto the binary namehandler(on Windows, set it tohandler.exe). - In the
customHandlersection, add a property namedenableForwardingHttpRequestand set its value to true.
- In the
Implements the API
-
Open the project in your prefered editor/IDE if it is not VSCode. Note that you need this VSCode window latter for publishing.
-
In Cargo.toml, add the following dependencies. This example uses
actix-webframework.[1][2]1
2
3
4
5
6
7
8
9teloxide = { version = "0.7", default-features = false, features = ["macros", "auto-send", "rustls"] }
log = "0.4"
actix-web = "4"
url = "2.2"
anyhow = "1.0"
serde = { version = "1.0", features = ["derive"] }
serde_json = "1.0"
getrandom = "0.2"
afch-logger = "0.2" -
Here is an example implementation of
src/main.rs.1
2
3
4
5
6
7
8
9
10
11
12
13
14
15
16
17
18
19
20
21
22
23
24
25
26
27
28
29
30
31
32
33
34
35
36
37
38
39
40
41
42
43
44
45
46
47
48
49
50
51
52
53
54
55
56
57
58
59
60
61
62
63
64
65
66
67
68
69
70
71
72
73
74
75
76
77
78
79
80
81
82
83
84
85
86
87
88
89
90
91
92use actix_web::post;
use actix_web::Responder;
use actix_web::{web, App, HttpResponse, HttpServer};
use std::env;
use std::future::Future;
use std::net::Ipv4Addr;
use teloxide::adaptors::AutoSend;
use teloxide::requests::{Requester, RequesterExt};
use teloxide::types::Update;
use teloxide::types::{MediaKind, MessageKind, UpdateKind};
use teloxide::Bot;
fn rand_u64() -> Result<u64, getrandom::Error> {
let mut bytes = [0u8; 8];
getrandom::getrandom(&mut bytes)?;
Ok(u64::from_le_bytes(bytes))
}
fn pick<T>(items: &[T]) -> Result<&T, getrandom::Error> {
// Not mathmatically with the same possibility, but good enough for our purposes
let index = rand_u64()? % items.len() as u64;
Ok(&items[index as usize])
}
// Log the error and simply return a 500
async fn run_api(block: impl Future<Output = anyhow::Result<HttpResponse>>) -> HttpResponse {
match block.await {
Ok(res) => res,
Err(err) => {
log::error!("{}", err);
HttpResponse::InternalServerError().body("Internal Server Error")
}
}
}
// The `pick-bot-func` should be the function name.
async fn setup(body: web::Json<Update>, bot: web::Data<AutoSend<Bot>>) -> impl Responder {
run_api(async move {
let update = body.0;
if let UpdateKind::Message(message) = update.kind {
let chat_id = message.chat.id;
if let MessageKind::Common(message) = message.kind {
if let MediaKind::Text(text) = message.media_kind {
if let Some(content) = text.text.strip_prefix("/pick") {
let selections: Vec<&str> = content
.lines()
.filter(|line| !line.trim().is_empty())
.collect();
log::info!("selections: {:?}", selections);
if selections.is_empty() {
bot.send_message(chat_id, "Error: Message is empty or blank.")
.await?;
} else {
bot.send_message(chat_id, *pick(&selections)?).await?;
}
} else {
bot.send_message(chat_id, "Error: Message is not a /pick command.")
.await?;
}
}
}
}
Ok(HttpResponse::Ok().finish())
})
.await
}
async fn main() -> anyhow::Result<()> {
afch_logger::init();
let port_key = "FUNCTIONS_CUSTOMHANDLER_PORT";
let port: u16 = match env::var(port_key) {
Ok(val) => val.parse().expect("Custom Handler port is not a number!"),
Err(_) => 3000,
};
let bot = Bot::from_env().auto_send();
log::info!("Starting server on port {}", port);
HttpServer::new(move || {
App::new()
.app_data(web::Data::new(bot.clone()))
.service(setup)
})
.bind((Ipv4Addr::UNSPECIFIED, port))?
.run()
.await?;
Ok(())
}
The key point is to handle the POST request of api/<function name> endpoint.
Local Testing
Before testing, you need to configure the environment. Open local.settings.json, in the Values section.
- Add a property named
TELOXIDE_TOKENand set its value to your Telegram Bot token. - If you have any other config that read from environment variable, configure it in this section.
After you have configured, follow the following steps to test it locally.
-
Build the project and copy the binary to project root.
1
2
cargo build
cp target/debug/handler . -
Run
func startto run the azure function locally. When the function is setup, you can find the listening port in the output. -
In another terminal, run
ngrok http <Function listening port>. Afterngrokis setup, you can find the URL in the output. -
Open the following URL in your browser (or
curl -L).1
api.telegram.org/bot<Telegram Bot Token>/setwebhook?url=<ngrok URL>/api/<function name, `pick-bot-func` in this example>
If you see the
Webhook was setresponse, you have setup the webhook. -
Try to send a message to telegram bot. You should get the response.
Publish
In order to publish the function to Azure Function, you need to compile into a Linux executable, better to be musl to avoid glibc version issue. Because the teloxide depends on some libraries that makes cross-compiling tricky, here you can consider using GitHub Action for compiling and publishing.
First we need to publish our function from VSCode so that required resource is created. Note that the function won't work yet because it requires a Linux executable.
-
If you are using Windows, change the
defaultExecutablePathin host.json fromhandler.exetohandler. This instructs the function app to run the Linux binary. -
Add
targetto.funcignorefile. -
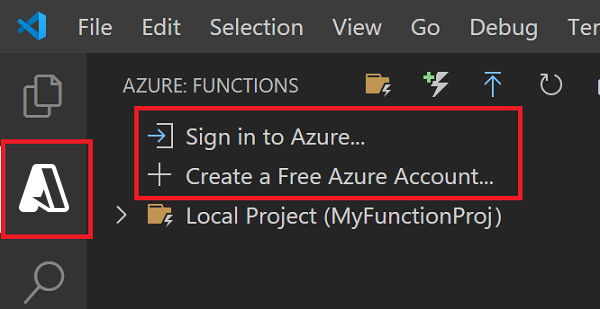
If you aren't already signed in, choose the Azure icon in the Activity bar, then in the Azure: Functions area, choose Sign in to Azure....

When prompted in the browser, choose your Azure account and sign in using your Azure account credentials.
After you've successfully signed in, you can close the new
browser window. -
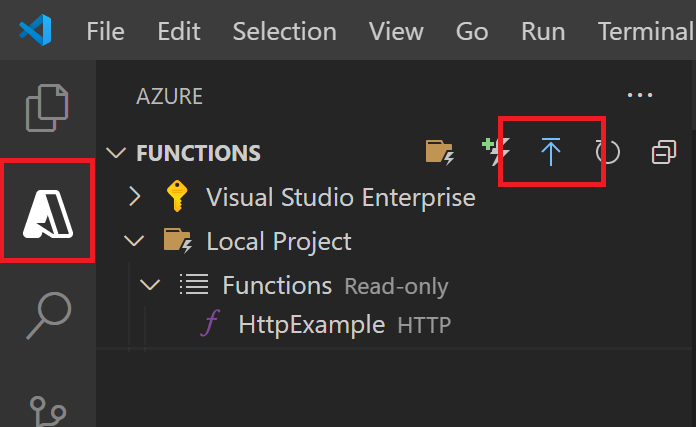
Choose the Azure icon in the Activity bar, then in the Azure: Functions area, choose the Deploy to function app... button.

-
Provide the following information at the prompts:
-
Select subscription: Choose the subscription to use. You won't see this if you only have one subscription.
-
Select Function App in Azure: Choose
+ Create new Function App (advanced).
-
Enter a globally unique name for the function app: Type a name that is valid in a URL path. The name you type is validated to make sure that it's unique in Azure Functions.
-
Select a runtime stack: Choose
Custom Handler. -
Select an OS: Choose
Linux. -
Select a hosting plan: Choose
Consumption. -
Select a resource group: Choose
+ Create new resource group.
Enter a name for the resource group. This name must be unique within
your Azure subscription. You can use the name suggested in the prompt. -
Select a storage account: Choose
+ Create new storage account. This name must be globally unique within Azure. You can use the name suggested in the prompt. -
Select an Application Insights resource: Choose
+ Create Application Insights resource. This name must be globally unique within Azure. You can use the name suggested in the prompt. -
Select a location for new resources: For better performance, choose a region near you.The extension shows the status of individual resources as they are being created in Azure in the notification area.
-
-
Find your newly created function under Azure Portal, then click it.
-
Click Get publish profile to download the profile which will be used latter.

-
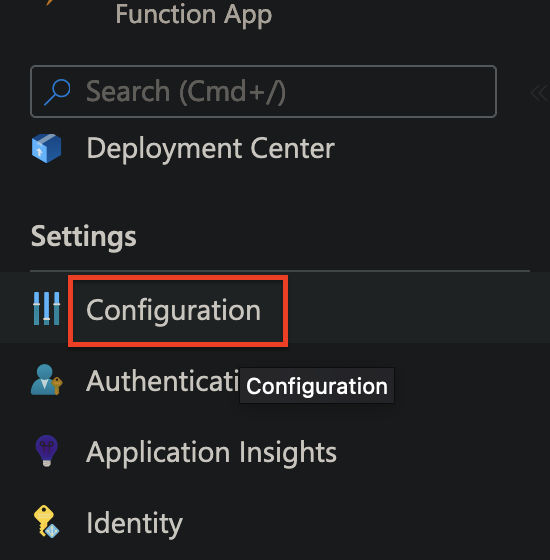
In ths settings, click Configuration.

-
Delete
WEBSITE_RUN_FROM_PACKAGE. -
Click New application setting, enter
WEBSITE_MOUNT_ENABLEDas Name and0as Value, click Ok. [3] -
Click New application setting, enter
TELOXIDE_TOKENas Name and the Telegram Bot token as Value, click Ok. -
If you have other configurations via environment variable, set it here.
-
Click Save.
-
After the steps above, you have prepared the function resources. Now you can publish the function through GitHub Action.
-
Create a GitHub Repo.
-
Go to Settings > Secrets > Action.
-
Click New repository secret, enter
AZURE_FUNCTIONAPP_PUBLISH_PROFILEas Name, the content of the publish profile file you downloaded before as Value, click Add secret. -
Click New repository secret, enter
AZURE_APP_NAMEas Name, the function app name as the value [4], click Add secret. -
Add the following content in
.github/workflows/release.ymlfile.1
2
3
4
5
6
7
8
9
10
11
12
13
14
15
16
17
18
19
20
21
22
23
24
25
26
27
28
29
30
31
32
33
34
35
36
37
38
39
40
41
42
43
44
45
46name: Build and Release
on:
push
jobs:
release:
name: Deploy to Azure Function
runs-on: ubuntu-20.04
steps:
- name: Setup | Checkout code
uses: actions/checkout@v2
- name: Setup | Rust toolchain
uses: actions-rs/toolchain@v1
with:
toolchain: stable
profile: minimal
target: x86_64-unknown-linux-musl
- id: cargo-cache
name: Cache
uses: Swatinem/rust-cache@v1
with:
key: release-azure-function
- name: Setup | musl tools
run: sudo apt install -y musl-tools
- name: Build | Tests
run: cargo test --release --target x86_64-unknown-linux-musl -- --nocapture
- name: Build | Build
run: cargo build --release --target x86_64-unknown-linux-musl
- name: Deploy | Move binary
run: mv ./target/x86_64-unknown-linux-musl/release/handler .
- name: Deploy | Azure Function
uses: Azure/functions-action@v1
id: fa
with:
app-name: ${{ secrets.AZURE_APP_NAME }}
package: .
publish-profile: ${{ secrets.AZURE_FUNCTIONAPP_PUBLISH_PROFILE }}
respect-funcignore: true -
Push the code to the GitHub Repo, wait for the GitHub Action finish.
-
At the azure function page, copy the URL.
-
Open the following URL in your browser (or
curl -L):api.telegram.org/bot<Telegram Bot Token>/setwebhook?url=<Azure Function URL>/api/<function name, pick-bot-func in this example>. If you see theWebhook was setresponse, you have setup the webhook.
Now you're Telegram Bot is hosted in Azure Function!
We disable the default feature of
teloxideso thatopensslwon't be a dependency, which is tricky to be cross-compiled to musl even under Linux. ↩︎The
afch-loggeris a logger implementation that uses some tricks to get expected log level on Azure. Check the repo for details. ↩︎The two steps above are to workaround Azure/functions-action/issues/81. ↩︎
Note: this is NOT the function name. It's the app name you entered at step 5 of publishing function from VSCode. ↩︎